Showing posts with label editing. Show all posts

Monday, March 9, 2009

Burning an entirely open source DVD (with Menus!)

This tutorial is for a little more advanced tinkerers so read on bold burner!

Okay, so most people are not satisfied with DVD Flick on its own for one main reason. No menus. Trust me, it's been suggested to the author MANY times and he always responds that DVD Flick was not written with menus in mind. And, let's face it, I didn't write any of the code so I'm not going to gripe. I love DVD Flick (see previous post). But, it is nice to have some menus on your burned DVDs - especially if you are sharing them with others. In an exhaustive effort to find a viable open source alternative to my (edit) copy of Encore I discovered another piece of software solves the menu problem nicely: DVD Styler.

DVD Styler allows you to create custom menus with custom buttons and burn simple DVDs (or complex DVDs if you're truly brave). I've spent WAY too long working on this program to get the output that I wanted so I figured I would pass the resulting wisdom along and save my readers some precious time. So here's the easy way to do it:

1. Burn your video files to an .ISO with DVD Flick (yep, you'll still need it.) Two reasons, 1 - it'll burn anything - especially those pretty xvid files you've created with autogk. 2 - DVD Styler is happiest when you feed it .VOB files - DVD Flick creates these nicely. They can be found in DVD Flick's temp files or by mounting the image and exploring the .ISO or by burning the image and exploring the resulting DVD. However you do it, you'll want to create the .VOB files before fiddling with DVD Styler.

2. Now, open DVD Styler and select a background. If you don't like any of the default backgrounds you can add your own by dragging an image file into DVD Styler's black workspace. Note: I always edit my images and size them to 720x480 in Gimp before importing them into DVD Styler.
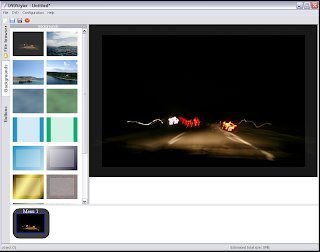
3. Add your newly created .VOB file by going into the file browser tab on the left and dragging the .VOB into the resources section at the bottom of DVD Styler. It will automatically be assigned a title number to look something like this:
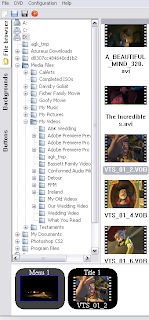

4. Now go to the buttons tab and select a default button. Drag it over to the workspace and place it where you would like it to show on the menu. By double clicking the newly placed button you can change the text and behavior of the button including which 'title' is played when it is selected. After adjusting the buttons as desired your are ALMOST ready to burn.

5. Go to the dropdown menus at the top and select Configurations > Settings and adjust the settings to represent the kind of DVD that you are going to burn. Then go to the DVD dropdown Menu and select Options. Give your DVD a label (name) and make sure all of these settings are also correct. Finaly...

6. Click the red circle icon to Burn the DVD.

If you've followed these instructions then it should burn without problems. IF it doesn't burn right then you may need to tinker a bit. Let me know if you have a problem and I'll see if I can't help ya out. Otherwise, happy burning!

Tuesday, March 18, 2008

Color correcting DV

One of the things that a lot of amateur DV film makers overlook is the amazing power of digital color correction. If you’ve ever watched dailies or outtakes/bloopers from a feature film you can see how very important color correction is. It can make your video look like a film instead of a home video. Options for color correction are all over the place. It’s possible to do some pretty good color correction in Virtual Dub with plugins or avisynth plugins but honestly I’ve never used them. I have used the brightness/contrast plugins as well as the levels plugin (which is great) but as far as hue/saturation I dunno. I’ve been using Premiere for years as well as Premiere elements which is a GREAT program for the price. Both will let you do some pretty hefty color corrections. Unfortunately, there are no open source video editors that I am aware of. Unless you have a mac, you’re stuck with Windows Movie Maker (blech) for video editing. Fortunately, Virtual Dub has blown video processing out the box – but it’s not really an editor. That’s a subject for a different post though. Here’s what you’ll be dealing with when you CC your video.

In your video editor (or if you want to practice in your photo editor you can – try The Gimp) go to the colors options. Look around through your dropdown menus at the top and you should find a group of options that say something like Levels, Brightness/Contrast, Hue/Saturation etc. THOSE are the things you’ll need to fix up the color. The first thing you want to do is make sure that your black is black and/or white is white.

If you’re using a powerful enough program then it can do this for you. Open up the levels filter and look for a little eye dropper or some option to set the black point or white point. If you have one of these beauts then you’re in luck. You should be able to click on that eyedropper or button or whatever, move it over to your picture and click on a point of the picture that you want to designate as black or white (depending on the selection available). This will automatically set the levels for the rest of the image according to what is needed to change that point to black or white (similar to a manual white balance on a camera). If you don’t have this option then you’ll need to adjust brightness and contrast and perhaps certain color saturations to try and really make the black areas look black and the white areas look white. The problem with “eyeballing” this is that most monitors are a bit off in their color calibration and therefore you could be correcting to the wrong colors.

Once your whites are looking white and blacks black then you can adjust brightness contrast (film tends to be a bit darker – but not always) and you’ll want to adjust the hue/saturation. The thing to remember with hue/saturation is that the hue is the color of the colors you are working with. The saturation is the “trueness” of the color. Think about dropping red food coloring into a glass of water. The higher the saturation of the color the more drops you add to the glass.

Now comes the fun part. As you play with the different color options you can completely change the look and feel of your video. For example:

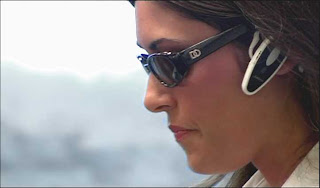
Before:


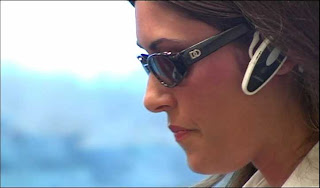
And After:

The great thing about Color Correcting your video is that you can give it whatever feel you want. Play around with a few of the other color options and you’ll be amazed with what you can come up with.

If you want to read my first education on color correction (since these guys gave me some great tips) you can check out this really great forum thread here:
http://www.dvxuser.com/V6/showthread.php?t=90759
Hooray for post processing!

Richie